• My series on making a Newtonian telescope
  • How Leon Foucault Made Telescopes

Guy's Math & Astro Blog

Guy's Math & Astro Blog

Category Archives: Optics

More about spray-coating astronomical mirrors with silver!

30 Monday Dec 2019

Posted by gfbrandenburg in astronomy, Optics, Safety, science, Telescope Making, Uncategorized

≈ Leave a comment

Here is a batch of articles and links concerning the spray-on process for making astronomical mirrors reflective using protected silver solutions.

Long ago, I translated Foucault’s monograph on making paraboloidal, silvered astronomical mirrors. Part of his article described the process that he and Steinheil developed for silvering, which involved using silver nitrate solutions and various other reagents. It looked quite tricky, and also required further polishing! Plus, our telescope making workshop here in Washington DC had a Navy surplus vacuum chamber that was (and still is) quite effective at putting on good-quality, inexpensive aluminum coatings for any mirror up to 12.5″ diameter.

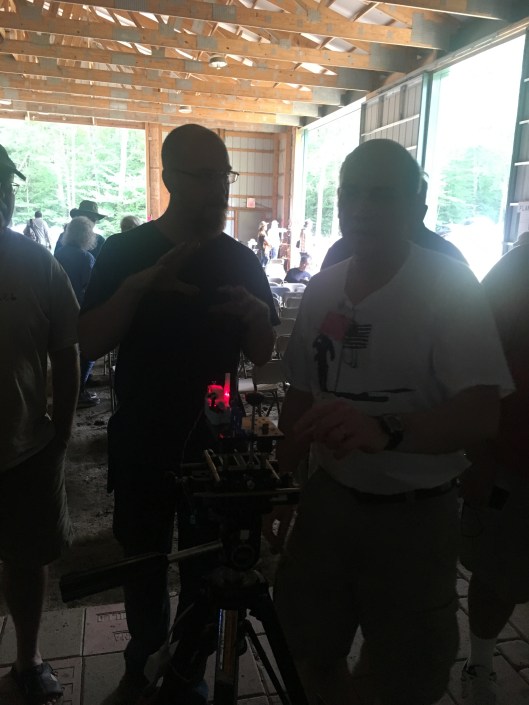
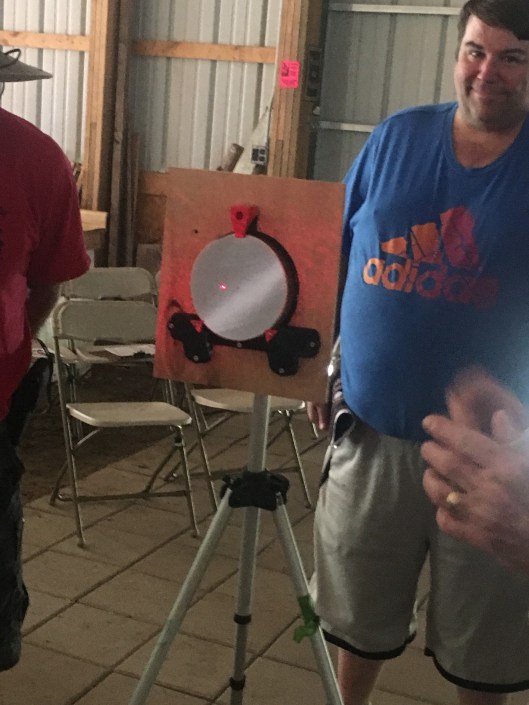
However, I and a couple of other ATMers (Bill R and Oscar O) are working on mirrors in the 16 to 18 inch range, and they simply won’t fit. So I was quite intrigued to watch how Peter Pekurar and some other folks coated a couple of rather large mirrors right in front of a small crowd of onlookers in a tent at this summer’s Stellafane.

I have a few videos on my webpage (here).

There is also an article on the process in the January 2020 Sky and Telescope, and a webpage (here) on the topic run by Pekurar and Howard Banich and others.

Not to mention a bunch of posts on Cloudy Nights (here) and a nice PDF explaining it all, (here).

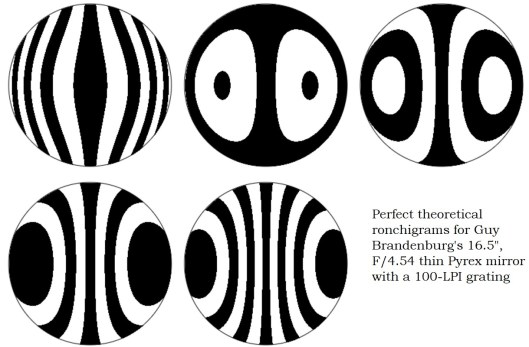
What is really, really amazing is that the webpage by Pekurar and Banich also has interferograms showing that the overcoating has absolutely no effect on the sub-microscopic, geometrical figure of the mirror! Unfortunately, it’s only effective against chemical attack, not against dirty fingers or scratches. They also did some careful experiments on reflectivity at various wavelengths with various treatments of the surface.

A couple of local ATMers and at least one professional at Goddard Space Flight Center have told me about their experiments with the process; they found that it is easy to mess up if you aren’t stringently clean and also easy to waste materials.

Problems Solved with the Old 6″ Refractor?

23 Monday Sep 2019

Posted by gfbrandenburg in astronomy, Hopewell Observatorry, Optics, science, Telescope Making

≈ 3 Comments

Tags

crown, figuring, flint, Kiess, lens cell, lenses, refractor, symmetry, testing

I found a few things that may have been causing problems:

(1) Whoever put the lens cell together last didn’t pay any attention at all to the little registration marks that the maker had carefully placed on the edges of the lenses, to show how they were supposed to be aligned with each other. I fixed that, as you see in the photo below. The reason this is probably important is that the lenses are probably not completely symmetrical around their central axes, and the maker ‘figured’ (polished away small amounts of glass) them so that if you lined them up the way he planned it, the images would be good; otherwise, they would probably not work well at all and could very well be causing the poor star test images we saw.

IMG_5310

2. The previous assembler also put eleven little tape spacers around the edges, between the two pieces of glass. More is apparently not better; experts say you should have three spacers, each 120 degrees apart from the other two. Done.

3. The bottom (or ‘flint’) element is slightly smaller than the other one (the ‘crown’), so it probably shifted sideways. That alone would be enough to mess up the star tests in the way that we saw. So I wrapped two thicknesses of blue painter’s tape around the outside of the flint, and put some three cardboard shims between the edges of the ‘crown’ and the aluminum cell.

4. There were no shims at all between the flint and the aluminum ring that holds it in place underneath. This caused some small scratches on the glass, and might have been warping the glass. I put in three small shims of the same type of blue painter’s tape, lined up with the other spacers.

We will see if these improvements help. I really don’t want to haul this all the way out to Hopewell Observatory and struggle with putting it back on the mount for a star test. That was just way too much work, much more than I expected! The next test will be with an optical flat placed in front of the lenses, and a Ronchi grating.

I would like to thank Bart Fried, Dave Groski, and several other people on the Antique Telescope Society website for their advice.

————————————-

By the way, these photos show how we held the refractor on the mounting plate for the Ealing mount at Hopewell Observatory.

IMG_5197
IMG_5200
IMG_5233
IMG_5239
IMG_5241

Trying to Figure Out Problems With a Century-Old Refractor

22 Sunday Sep 2019

Posted by gfbrandenburg in astronomy, History, Optics, Telescope Making, Uncategorized

≈ Leave a comment

Tags

antique, crown, flint, glass, Kiess, refractor, Telescope, testing

I am disassembling the lens cell of the >100 year old 6” f/14 Kiess refractor that produces horrible results on star tests.

There is absolutely no information inscribed anywhere inside the cell, inside the tube or outside it, nor on the edges of the lens elements. I can only guess as to what type of glass they used, and figuring it out won’t be easy. The least destructive method I can think of beginning to do this is by weighing them and calculating out their precise volumes, and from that calculating their densities. A graduate gemologist could probably calculate their indices of refraction, but not me.

Tomorrow I plan to measure the curvatures of the lens elements; perhaps someone familiar with old telescopes will then have clues as to who might have made this particular type of optical prescription.

The shims seem to me to be intact, so I think I can rule out astigmatism from lens elements put in crooked. [OTOH, someone on the Antique Telescopes Facebook group says that the large number of small black spacers in between the lenses may itself be causing the massive astigmatism problem that we found in the star test. I don’t have enough experience to be able to tell whether that’s correct or not.]

The small chips on the edge of the second (meniscus? Flint?) lens element were already there when I got it. I was also surprised to find that the first (biconvex, crown?) lens element has a small bubble very close to the center. It’s probably not significant, but I will check for strain as well.


Gently tapping off the lens cell from the tube
Note that the retaining ring holding the front of the first lens merely slides into the cell; it’s held in place by four screws. The threading is on the inside of the ring, and the outside is smooth
You can see the black tape and tan cardboard spacers
Me looking puzzled
Me looking puzzled
The cardboard spacers around the edges
The two lenses together; note the multiple, small black tape spacers between the pieces of glass
The original chips on the second lens element
The empty lens cell. Note that they didn't make it black
The empty lens cell. Note that they didn’t make it black

12-inch Ealing-Made Ritchey-Chretien Telescope is Sold [EDIT]

20 Friday Sep 2019

Posted by gfbrandenburg in flat, Hopewell Observatorry, optical flat, Optics, Telescope Making

≈ 3 Comments

Tags

cassegrain, convex, figuring, for sale, primary mirror, richey-chretien, secondary mirror, Telescope

EDIT: It has now been sold to an ambitious telescope maker in Italy. 

We had a 12-inch Casssegrain optical telescope assembly for sale at an extremely attractive price: just two hundred dollars (or any reasonable offer). You pay for shipping.

The full-thickness primary mirror alone is worth much more than that as a raw piece of unfinished Pyrex! (United Lens charges $450 for an equivalent, 12.5″ diameter, roughly 2″ thick, raw, unfigured, disk of Borofloat!)

The telescope was part of a package (mount-cum-telescope) that was purchased from the Ealing company back in the 1960s by the University of Maryland. The scope itself never gave satisfactory images, so the UMd observatory sold it off in the early 1990s, and it ended up at the Hopewell Observatory about a decade before I became a member. Hopewell kept the mount, which still works quite well, but removed the telescope and replaced it with a 14-inch Celestron Schmidt-Cassegrain.

I recently examined the telescope itself (the one we are selling) and found that it indeed has a hyperbolic primary with a focal length of about 4 feet (so it’s f/4). Presumably, the convex secondary is also a matching hyperboloid, to create a Ritchey-Chretien design, but I don’t feel like perforating a large spherical mirror to create a Hindle sphere to test it properly. In any case, using a 12-inch flat, I was unable to produce decent Ronchi images.

As you may know, figuring and collimating a Richey-Chretien require a LOT of patience, more than I have. My suggestion would be to refigure the primary into a paraboloid, procure a standard flat, elliptical diagonal, and repurpose this as a Newtonian. Refiguring this mirror a task that I don’t feel like taking on, since our observatory already has a 14″ Newtonian, a 14″ SCT, and I already have built a 12.5″ Newtonian of my own. Plus, I am finding that figuring a 16.5″ thin mirror is plenty of work already.

So, our loss could be your gain! Make an offer!

I attach a bunch of photos of the OTA from several viewpoints, including a ronchigram. The mirror has been cleaned off since these picture were made; the little electronic motor was for remote focusing of the secondary.

IMG_0699
IMG_0702
IMG_0703
IMG_8151
IMG_8153
IMG_8160
IMG_0699
IMG_0702
IMG_0703
IMG_8151
IMG_8153
IMG_8160
IMG_0700
IMG_0711
IMG_8230
IMG_8233

A Weekend at Almost Heaven

06 Friday Sep 2019

Posted by gfbrandenburg in astronomy, Optics, science, Telescope Making, Uncategorized

≈ Leave a comment

Tags

Almost Heaven Star Party, binocular mount, dobsonian, NOVAC, Spruce Knob, star party

I spent Labor Day weekend at the Almost Heaven Star Party very close to Spruce Knob, the highest ridge in West Virginia. When the skies cleared at night, the stars and Milky Way were magnificent, but that only happened about 1 night out of three. My 12.5″ home-made Dobsonian telescope performed very well; in fact, because its primary and secondary mirror are almost fully enclosed by the light shrouds and upper cage, I was able to keep observing long after all the other refractors and Schmidt-Cassegrains were closed down by the heavy dew. (To keep the dew off of my finder scope and Telrad, I used large rubber bands to wrap chemical hand warmer packs around them, and that crude and cheap arrangement worked very well!)

Here are three photos taken by me:

Exploring the geology of Spruce Knob Mountain Center: Lyle Mars in blue shirt and white hat is in front of the entrance to a cave carved in limestone
Selfie with me in front of three others on the geology hike
This lovely sunset did not portend clear skies

All but the photo with the sextant were taken by Oscar.

Alan Goldberg teaching someone how to use a sextant
Me studying my charts, in front of parallelogram binocular mount
Oscar Olmedo and me at our campsite
Mike Laugherty and me
Me fiddling with my 12.5" home-made dob in the daytime
Me fiddling with my 12.5″ home-made dob in the daytime
Me fiddling with the parallelogram binocular mount in the daytime
Mike Laugherty and me fiddling with binocular mount
Left to right: Mike Laugherty, Oscar Olmedo, me
The lottery drawing for a whole bunch of neat prizes. None of us 3 won anything.

Cleaning Up a Century-Old Refractor

18 Sunday Aug 2019

Posted by gfbrandenburg in astronomy, History, Hopewell Observatorry, Optics, Telescope Making

≈ 5 Comments

Tags

antique, Carl Kiess, Hopewell, refractor, Telescope

Last week, I was helping staff and students at the University of Maryland’s Observatory to clean out a storage trailer.

We noticed a seven-foot-long, 6-inch diameter telescope that had been sitting in a corner there, unused, ever since it was donated to the National Capital Astronomers (NCA) club nearly ten years earlier by the son of the original owner, Carl Kiess,  who had worked at the Lick Observatory in California and the National Bureau of Standards in or near DC, but who had passed away nearly fifty years earlier. I figured I could put it on a motorized telescope mount at Hopewell Observatory and at a minimum test the optics to see if they were any good. The current officers and trustees of NCA all said they thought this was a good idea.

One thing that caught my eye was how filthy and flaky the coating was on the tube itself, although the lens appeared to be in good shape.

IMG_5043
IMG_5044

IMG_5027

The drive, while impressive, does not have a motor, requires a pier, and is extremely heavy. I decided not to mess with the drive and to put it temporarily on our existing, venerable, sturdy, motorized, electronic drive we have at Hopewell Observatory.

So I experimented with various abrasives and solvents to clean off the nasty green coating; a fine wire wheel inserted in an electric drill did the best job. Here it is partly cleaned off:

GHCW2253
IMG_5059

I then used Brasso for a final polish, followed by a final cleaning with acetone, and then applied several coats of polyurethane to keep it looking shiny for a number of years. (The lenses stayed covered for all of this!) So this is how it looks now:

IMG_5060
IMG_5061

The next task is to make a temporary holder and then put it on the mount, and then test the optics.

Bath Interferometer at Stellafane

06 Tuesday Aug 2019

Posted by gfbrandenburg in astronomy, flat, monochromatic, optical flat, Optics, Telescope Making

≈ Leave a comment

Tags

Bath interferometry

I am posting some photos and videos of the demonstration of a Bath interferometer on Saturday at the 2019 Stellafane convention.

IMG_4951

IMG_4951

IMG_4952

IMG_4953

IMG_4953

IMG_4955

IMG_4956

IMG_4956

IMG_4957

IMG_4957

IMG_4958IMG_4959

IMG_4960

IMG_4960

IMG_4961IMG_4962

IMG_4963

IMG_4963

IMG_4964

IMG_4964

Silvering Mirrors, and More, at Stellafane

05 Monday Aug 2019

Posted by gfbrandenburg in astronomy, flat, History, Math, monochromatic, optical flat, Optics, science, teaching, Telescope Making, Uncategorized

≈ 3 Comments

For me, these were the two most significant demos at the 2019 Stellafane Convention in Springfield, Vermont:

(1) Silvering large mirrors, no vacuum needed

We had a demonstration by Peter Pekurar on how to apply a layer of Silver (metallic Ag, not aluminum) onto a telescope mirror, accurately, with a protective, non-tarnishing overcoat, that works well. I looked through such a scope; the view was quite good, and I was told that interferograms are great also.

What’s more, the process involves overcoating a mirror with spray bottles of the reagents, without any vacuum apparatus needed at all. Note: Silver coated, not aluminum coated. This is big for me because the upper limit at our club’s aluminizer is 12.5″, but some of us are working on larger mirrors than that; commercial coaters currently charge many hundreds of dollars to coat them.

You can find information on some of these materials at Angel Gilding. Peter P said he will have an article out in not too long. Here are a few photos and videos of the process:

IMG_4972

Finished mirror; notice it’s a little blotchy


IMG_4978

IMG_4978


IMG_4981

IMG_4981

IMG_4985IMG_4987

(2) Demo and links for Bath Interferometer (see http://gr5.org/bath )

How to set up and use a Bath interferometer to produce highly accurate interferograms of any mirror for many orders of magnitude less cash than a Zygo interferometer. As I wrote earlier, Alan Tarica had taken the lead on fabricating one at the CCCC – NCA ATM workshop, and we eventually got it to work, but found it rather frustrating and fiddly to use.

The presenter is a HS teacher, and it shows: he explains things very clearly! On his website ( http://gr5.org/bath ) you can get plans for 3-D printing the parts for the Bath device, if you have any access to a 3-D printer, so you can print the parts out for yourself. He also has links to vendors that are selling parts for it, such as certain small lenses, mirrors and beam splitters. He shows you where you can get them for very little money from Surplus Shed and such places. Or you can purchase his really inexpensive kits that he’s already 3-D printed for you. Plus parts for an XYZ stage, which you will need for fine focus. The whole setup (not counting mirror stand and two tripods, which he assumes you have access to already) is under $130.

I will need to look carefully at our setup as built almost completely by Alan, and see how it differs and what we would need to do to make it better. The problem is that there are lots of little, tiny parts, and many of them need to be adjustable. We saw him doing LOTS of little adjustments!

Before his talk, I had absolutely no idea how this (or similar interformeters) really worked. Now I understand: the interference fringes that we see are really contour lines – like we see on on a USGS topo map, only with the mirror tilted in one direction or the other. A big difference with the USGS topo map is that there, the contour lines (isohypses – a new word for me today) are often 10 feet to 100 meters apart. In interferometry, the contour intervals are either one or one-half lambda (wavelength of light) apart – a really tiny amount! We need that level of accuracy because the surface we are studying is sooooooo flat that no other measuring system can work. His explanation of this whole thing now makes perfect sense to me. And the purpose of the software (free!) is to un-slant the mirror and re-draw it using the countour-line information.

Beautifully clear explanation!

Caution: a friend who works professionally in optics told me his team had made three Bath interferometers, using cheap but good quality ebay xyz stages, and found that they were just too much trouble; so they borrowed a very expensive commercial interferometer (costing many tens of kilobucks) from another department and are using that instead. I’m not selling my house to get a Zygo interferometer!!! But I will try the Bath interferometer instead.


Videos on Telescope Making from Gordon Waite

03 Thursday Jan 2019

Posted by gfbrandenburg in astronomy, astrophysics, flat, optical flat, Optics, Telescope Making

≈ Leave a comment

Tags

figuring, flats, Gordon Waite, machine, optical, Optics, parabolizing, Polishing, Telescope Making, testing optics, Waite Research, youtube

Gordon Waite is a commercial telescope maker who has made a number of very useful YouTube videos on his grinding, polishing, parabolizing, and testing procedures. I thought some of my readers might be interested in viewing them. The link is here, or else you can copy and paste this:

https://www.youtube.com/user/GordonWaite/videos

Some Progress – AT LAST! – With Figuring the 16.5″ f/4.5 Thin Mirror That Headlines This Blog

10 Saturday Nov 2018

Posted by gfbrandenburg in astronomy, Hopewell Observatorry, Optics, Safety, Telescope Making

≈ Leave a comment

Tags

Bob Bolster, George Ritchey, Grinding, Hopewell Observatory, matching Ronchi, Mel Bartels, Polishing, Ronchi, ronchigram, Telescope Making, testing

I have been wrestling with this mirror for YEARS. It’s not been easy at all. The blank is only about twice the diameter of an 8″ mirror, but the project is easily 10 times as hard as doing an 8-incher. (Yes, it’s the one in the photo heading this blog!)

Recently I’ve been trying to figure it using a polishing/grinding machine fabricated by the late Bob Bolster (who modeled his after the machine that George Ritchey invented for the celebrated 60″ mirror at Mount Wilson over a century ago). That’s been a learning exercise, as I had to learn by trial and error what the machine can and cannot do, and what strokes produce what effects. The texts and videos I have seen on figuring such a large mirror with a machine have not really been very helpful, so it’s mostly been trial and error.

My best results right now seem to come from using an 8″ pitch tool on a metal backing, with a 15 pound lead weight, employing long, somewhat-oval strokes approximately tangential to the 50% zone. The edge of the tool goes about 5 cm over the edge of the blank.

This little movie shows the best ronchigrams I have ever produced with this mirror, after nearly 6 hours of near-continuous work and testing. Take a look:

Final movie Nov 9

Final movie Nov 9

And compare that to how it used to look back in September:

hill and anomaly on 16

hill and anomaly on 16


Also compare that to the theoretically perfect computed ronchigrams from Mel Bartels’ website:

perfect theoretical ronchigrams for guy's 42 cm mirror

Part of the reason this mirror has taken so long is that after grinding and polishing by hand some years ago, I finally did a proper check for strain, and discovered that it had some pretty serious strain. I ended up shipping it out to someone in Taos, New Mexico who annealed it – but that changed the figure of the mirror so much that I had to go back to fine grinding (all the way back to 120 or 220 grit, I think), and then re-polishing, all by hand. I tried to do all of that, and figuring of the mirror, at one of the Delmarva Mirror Making Marathons. It was just too much for my back — along with digging drainage ditches at Hopewell Observatory, I ended up in a serious amount of pain and required serious physical therapy (but fortunately, no crutches), so this project went back into storage for a long, long time.

Recently I’ve tried more work by hand and by machine. Unfortunately, when I do work by hand, it seems that almost no matter how carefully I polish, I cause astigmatism (which I am defining as the mirror simply not being a figure of rotation) which I can see at the testing stand as Ronchi lines that are not symmetrical around a horizontal line of reflection. (If a Ronchi grating produces lines that look a bit line the capital letters N, S, o Z, you have astigmatism quite badly. If astigmatism is there, those dreaded curves show up best when your grating is very close to the center of curvature (or center of confusion) of the central zone.

Using this machine means controlling or guessing at a LOT of variables:

  1. length of the first crank;
  2. length (positive or negative) of the second crank;
  3. position of the slide;
  4. diameter of the pitch lap;
  5. composition of the pitch;
  6. shape into which the pitch lap has been carved;
  7. amount of time that the lap was pressed against the lap;
  8. whether that was a hot press or a warm press or a cold press;
  9. amount of weight pushing down on the lap;
  10. type of polishing agent being used;
  11. thickness or dilution of polishing agent;
  12. temperature and humidity of the room;
  13. whether the settings are all kept the same or are allowed to blend into one another (eg by moving the slide);
  14. time spent on any one setup with the previous eleven or more variables;

Here is a sketch of how this works

bolster's ritchey-like machine

← Older posts
Newer posts →

Subscribe

  • Entries (RSS)
  • Comments (RSS)

Archives

  • June 2026
  • May 2026
  • April 2026
  • February 2026
  • December 2025
  • November 2025
  • October 2025
  • September 2025
  • July 2025
  • January 2025
  • November 2024
  • October 2024
  • August 2024
  • July 2024
  • May 2024
  • April 2024
  • January 2024
  • December 2023
  • October 2023
  • August 2023
  • June 2023
  • May 2023
  • April 2023
  • November 2022
  • October 2022
  • August 2022
  • July 2022
  • June 2022
  • May 2022
  • April 2022
  • February 2022
  • January 2022
  • December 2021
  • October 2021
  • September 2021
  • August 2021
  • July 2021
  • June 2021
  • May 2021
  • March 2021
  • December 2020
  • October 2020
  • September 2020
  • August 2020
  • March 2020
  • February 2020
  • January 2020
  • December 2019
  • November 2019
  • September 2019
  • August 2019
  • June 2019
  • May 2019
  • January 2019
  • November 2018
  • October 2018
  • September 2018
  • August 2018
  • May 2018
  • March 2018
  • January 2018
  • November 2017
  • October 2017
  • September 2017
  • August 2017
  • July 2017
  • June 2017
  • May 2017
  • April 2017
  • February 2017
  • December 2016
  • September 2016
  • June 2016
  • May 2016
  • April 2016
  • March 2016
  • February 2016
  • January 2016
  • December 2015
  • November 2015
  • August 2015
  • July 2015
  • April 2015
  • March 2015
  • February 2015
  • January 2015
  • December 2014

Categories

  • astronomy
  • astrophysics
  • education
  • flat
  • History
  • Hopewell Observatorry
  • Math
  • monochromatic
  • nature
  • optical flat
  • Optics
  • Safety
  • science
  • teaching
  • Telescope Making
  • Uncategorized

Meta

  • Create account
  • Log in

Blog at WordPress.com.

  • Subscribe Subscribed
    • Guy's Math & Astro Blog
    • Join 54 other subscribers
    • Already have a WordPress.com account? Log in now.
    • Guy's Math & Astro Blog
    • Subscribe Subscribed
    • Sign up
    • Log in
    • Report this content
    • View site in Reader
    • Manage subscriptions
    • Collapse this bar

Loading Comments...